Wednesday, March 30, 2011

Potato Cake--From Three Potatoes


Spring came to Washington DC for a brief moment and left again. It seems like it is going to stay with us forever and a snowy rain has been falling from the sky today. I had no choice but to apologize to the potatoes in my refrigerator with whom I was so arrogant the other day. This cold weather makes me still want to eat warm comfort warm food rather than cold crispy salads. And I know that if by any chance warm days will arrive this spring, I will never have an opportunity to use these huge baking potatoes I bought some time ago.

I decided to use all of them and make a potato cake. This is one of those dishes that can unite my whole family at the table. Everyone likes it without any reservations as it is totally vegetarian and very satisfying as many potato dishes are. I am sure it could be delicious as well with some fried bacon inside, but my son would not participate in such a feast. There is a similar dish in Polish cuisine, and we serve it with a meat sauce, Hungarian style.

The beauty of that dish is that it can be made whenever we open a refrigerator asking ourselves "What do we have here? Oh, nothing, just three potatoes". But despite that sad discovery an hour later we can enjoy a nice dinner.

This cake can be made on a frying pan, but that would require more experience, especially when it comes to flipping it upside down. Baking it in an oven could be less messy. Another reason for using an oven would be the smell. I noticed that, no matter how hard my kitchen hood vent is working, the smell of any oil-fried dishes, especially potatoes, beef, and fish is always felt even in the most remote corners of my house. Somehow this is much less of a problem when I prepare these meals in an oven.

As you will see it is a very plain recipe but what makes this dish taste great is a ground nutmeg added to the cake and the spicy yogurt sauce that is put on top. I also like to serve it with with a lettuce salad, drizzled with vinegar dressing.


Potato Cake
(Serves four; should be made in a 10" form)

Ingredients:
3 large baking potatoes(about 2 pounds,)
1 medium onion, chopped,
2 eggs, beaten,
2 tbsp flour,
1/2 tsp salt and 1/4 tsp black ground pepper,
1/4 tsp ground nutmeg,
1 tbsp olive oil.

Preparation:
1. Preheat oven to 375F.
2. Peel off potatoes and grate them on a large hole grater. Put potatoes in a medium bowl squeezing excess juice.
3. Add onion, eggs, flour, and spices, and mix well.
4. Pour oil in a baking pan and spread it all over it. Transfer the potato mixture to a pan and spread it evenly.


5. Bake for an hour or until the top of the cake becomes dark gold.


Cut into four pieces and serve with yogurt sauce on top.

Yogurt sauce:
1 cup Greek yogurt,
2 garlic cloves minced,
1/4 cup chopped chives,
salt and pepper to taste.
Mix all the ingredients and serve in a separate bowl to accompany the potato cake.

Sunday, March 27, 2011

White Chocolate Blondies--If You Do Not Like Brownies


True chocolate connoisseurs, who appreciate most the dark and bitter chocolate that is very rich in cocoa, probably do not even consider white chocolate chocolate. But I am a white chocolate lover--the lighter the better. Ever since I have tried it as child, imported from Holland, I fell in love with its taste forever which suited my sweet tooth very well. I like it so much, also probably because I do not like dark chocolate at all, even if it comes from such reputable Belgian companies as Neuhaus or Leonidas. Fortunately, all good chocolateries are selling their chocolates by pieces and I can always fill my box with milk or white chocolate pralines.

Similarly, I also prefer milk chocolate or white chocolate desserts to anything made with dark chocolate. For the same reason I am not a big lover of brownies, as they are usually made from dark chocolate. Instead I keep exploring the culinary world in search for interesting milk and white chocolate recipes.

At present, I am working on a recipe for a white chocolate mousse, hoping to achieve perfection. It should be very delicate and fluffy, but at the same time not overwhelmingly sweet as some white chocolate desserts can be. This however is still work in progress.

Meanwhile, I found in my files an old recipe from the In Style magazine for white chocolate blondies. I gathered all the ingredients and rushed to try it out. The blondies disappeared shortly after they were cold enough to be eaten, mostly because of me and my younger son, who likes absolutely all kinds of chocolate, and found these blondies exceptionally good. They were sweet and spongy but the macadamia nuts gave them also nice crunchiness. They were an excellent treat with a strong espresso. Definitely worth making again and next time I will double their amount.


Macadamia Nut Blondies
(Makes 12-16 blondies)

Ingredients:
1 cup all-purpose flour,
1/4 tsp baking powder,
pinch of salt,
1 stick unsalted butter, room temperature,
1 cup brown sugar,
2 eggs,
2 tsp vanilla,
1 cup roughly chopped macadamia nuts,
1/2 cup good quality (e.g., Ghirardelli) white chocolate chips.


Preparation:
1. Preheat oven to 350F.
2. Put butter and sugar in a bowl and, using an electric mixer, combine them until fluffy.
3. Add one by one eggs beating in between well and add vanilla at the end.
4. Add in flour, baking powder, and salt, and blend again well.
5. Fold in nuts and chocolate chips into the batter.
6. Spray a glass baking dish (8x8 inch) with nonstick vegetable oil.
7. Pour the batter over the glass dish and bake for 25-30 minutes.


Take the blondies out of the oven, cut into diamonds, and enjoy.

Wednesday, March 23, 2011

White Zucchini Lasagna--No Pasta Required


With the first days of spring and warmer weather, I bury in my refrigerator all those meats and potatoes, which missed their chance to become comfort food during the cold days, and look with desire at all the crunchy and green vegetables that the spring brings about. Before we will even notice cold soups and fresh vegetable pasta will rule on our deck tables, and the neighborhood yards will beam with the aroma of grilled meats.

This winter I made exceptionally many comfort dishes, often coming from my native tradition, trying to keep my mother busy in the kitchen, but many of these winter specialties I will save for the next season.

Influenced by the weather, I came home from grocery shopping with a bag full of vegetables, which looked so fresh as if they grew in my own yard. I bought a couple of pounds of zucchini, red peppers, and fennel, for the first time ever. As a result, last week we had many vegetarian dishes for dinner to celebrate the first days of spring.

I bought so much zucchini that I decided to make the whole dish of them and I came with an idea of a zucchini lasagna in white cheese and béchamel sauce. White sauce lasagna with spinach is my kids' favorite, so I was hoping I could rely on that to smuggle zucchini into their diet. For those who never made, preparing the béchamel sauce is the most difficult part of this recipe. Other than that, it is a very simple dish.

Contrary to the conventional culinary wisdom, I always make my béchamel sauce with cold rather than warm milk. In spite of that, it has always turned out perfect. The use of cheese increases the calorie content of this dish, but it is still a leaner dish than a typical lasagna, which is based on pasta.


Zucchini Lasagna

Ingredients:
For bechamel sauce
3 tbsp butter,
3 tbsp flour,
2 cups milk,
1/4 tsp nutmeg,
salt and pepper to taste.
For lasagna
8-10 medium green zucchinis, sliced lengthwise into 3-4 slices each (with the ends trimmed),
15 oz ricotta cheese,
1 cup shredded mozzarella cheese,
4 cloves garlic, sliced,
1 egg,
salt and pepper,

Preparation:
To make béchamel sauce
1. Melt butter in a medium pot over a low heat and, when liquid, add flour. Mix well with an egg whisker until it turns into a smooth paste.
2. Take the pot off the heat and pour in one cup of milk. Mix well with a whisker until it makes a smooth sauce. Add another part of milk and whisk.
3. Return to the heat and mixing constantly bring the sauce to boil. Let it boil for about 2-3 minutes on the low heat. Season with salt, pepper, and nutmeg.
To make lasagna
1. Preheat oven to 400 F.
2. Spread half of the béchamel sauce over a bottom of a medium sized oven-proof dish. Cover with slices of zucchini and slices of garlic. Season with salt and pepper.


3. Mix ricotta with egg and spread half of it on top of the first zucchini layer.
4. Cover ricotta cheese with another layer of zucchini and again season with salt, pepper, and garlic.
5. Cover the second layer of zucchini with the remaining ricotta.
6. Put the last zucchini layer on top of the ricotta. Sprinkle with salt and pepper, and the rest of the bechamel sauce over it.
7. Cover the bechamel sauce with shredded mozzarella cheese.
8. Bake for 30-40 minutes or until the sauce bubbles and the top becomes gold.


Serve with a lettuce salad, either with bread or as stand alone dish.

Monday, March 21, 2011

Farmers' Cheese and Cinnamon Gnocchi--For the Lazy Ones


Although in a culinary history they probably belong to the gnocchi family, we consider them very Polish and call them "leniwe pierogi" (lazy dumplings) or simply "leniwe" because they are based on essentially one ingredient and do not require much work. Similar to the Italian ricotta gnocchi, they are made with "twarog" (farmers' cheese that resembles ricotta), which is very common in the Polish cuisine, for example to make cheese cakes, and always has a more or less sour taste, as it is made of sour milk. Thanks to that, our cheese gnocchi have a distinctly Eastern European flavor.

I meant to post this recipe for a long time. It is a very easy and basic dish that everyone in Poland knows and all Polish kids love. The farmers' cheese (for example, the Friendship All Natural Farmer Cheese) you can get in the US is not exactly like our twarog (or German or Swiss quark) but it is close enough to make decent leniwe. You have to keep in mind though that the American farmers' cheese is not as sour as the Polish version but instead it is more salty. I gave it a try last week to make leniwe for a dinner for my kids.

At this point, I must say that sweet dinner meals have always been, and I suppose still are, very popular in Poland, especially on Fridays. We make many such sweet meals (not just desserts)--dumplings, noodles, pancakes, crepes. These gnocchi are just one example. We eat them sweet, sprinkled with sugar, dusted with cinnamon, and with hot clarified butter poured on top. Cinnamon is what really makes these gnocchi taste unique. I use the Vietnamese cinnamon that I bought some time ago, which I has an unbelievably strong aroma, unlike any other I have tried. If you are a great cinnamon lover I think this cinnamon is just for you.


Farmers' Cheese Gnocchi
(Serves four)

Ingredients:
2 packs (about 15 oz) Friendship All Natural Farmer Cheese,
1 egg,
1 cup all purpose flour,
1/4 cup sugar,
4 tbsp melted butter,
cinnamon powder.

Preparation:
1. Place the cheese in a large bowl and pressing with a fork mush the cheese into small crumbles.
2. Add bitten egg and flour and knead the whole mix in a dough. Try not to use more flour than 1 and 1/3 cup as the dough will become dense and gnocchi will be hard.
3. On a surface dusted with flour form 2-3 dough snakes and cut them diagonally.


4. In a large pot cook 6-8 cups water with a tbsp of salt. Drop gnocchi on a boiling water and cook them until they appear on the surface plus 1-2 minutes. It is important not to overcook them because they will loose they shape.
5. Drain gnocchi on the colander and put on a serving bowl. Pour melted butter on top, sprinkle them with sugar, and dust with cinnamon--as much as you like it.


Serve warm, soaked in hot butter, which brings out the cinnamon's flavor.

Friday, March 18, 2011

Dried Porcini Soup--My Number One Soup


Using my mother's help and knowledge, I have been recently cooking a lot of my native food, including some dishes that I have never cooked myself. I write down these recipes diligently just in case one day I feel like having them again and of course to share them on the blog.

One of such dishes which I always loved but never cooked myself was the traditional Polish soup made with dried wild mushrooms. It is my absolutely number one soup among all the soups in the world. So the other day, on my birthday, I asked my mom to cook this soup for me.

It was a pretty egoistic request as I had only one cup of dried porcini left over from last Christmas (we use a lot of them for Christmas to prepare our traditional dishes). Such amount should be enough to serve four, as this recipe prescribes, although not necessarily four people like me who like to have a lot of mushrooms in their soup and usually eat two plates of it at once. But it was my birthday after all and I felt like having something that I do not eat everyday, or almost cannot afford.

Dried mushroom soup in Poland is a delicacy but not something completely out of the ordinary, as all its ingredients are widely available. We pick up and dry wild mushrooms ourselves when they are in season or can buy them at food markets at any time of the year. Here, unless I smuggle dried porcini from Poland in my luggage, it is a pretty luxurious request. I know, you can buy dried porcini here, but they are expensive and not available everywhere.

When I took my porcini out of the bag and their aroma filled the air, my son who hates all kinds of mushrooms (he picked them last summer wearing rubber gloves like a surgeon) left the kitchen screaming "Take this fungus out of my sight!" Well, it appears that there was at least one family member less to share my soup with, so maybe my request in the end was not as egoistic as I thought.

This soup originally is made on a meat stock, but I like the vegetarian version better, especially if we are lucky enough to work with the best quality mushrooms, like porcini. Using just the vegetable stock helps bring out their woody aroma.

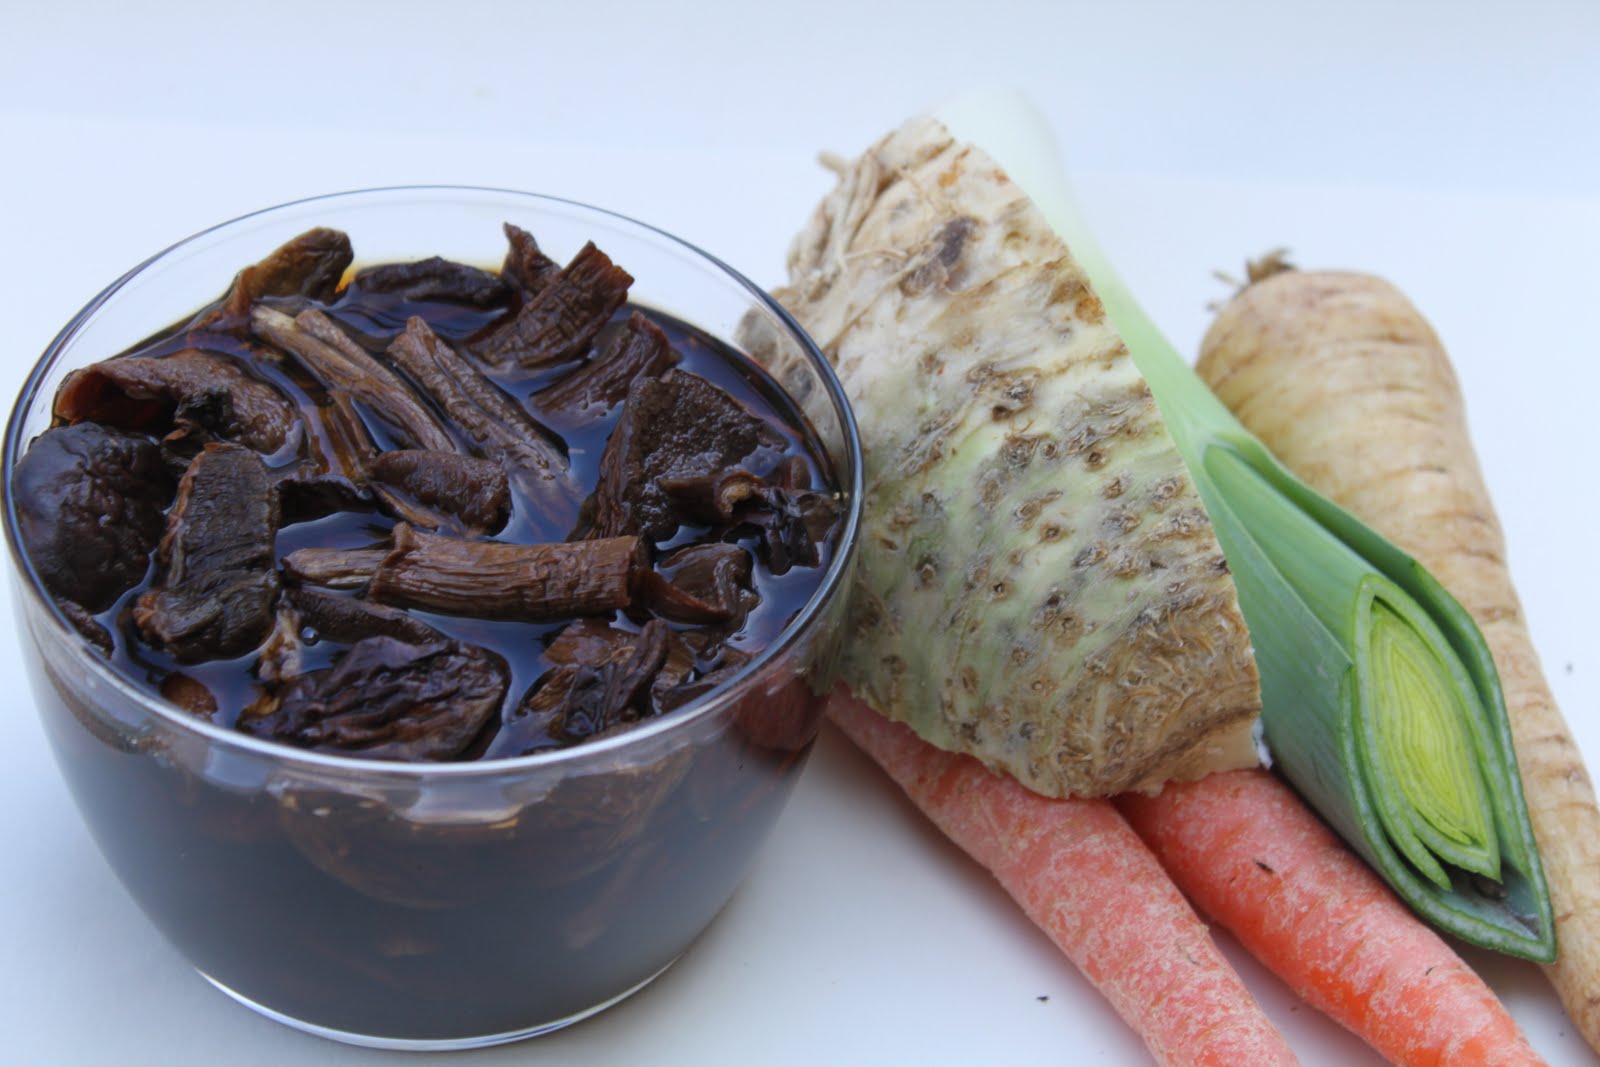
Parsley root is another important ingredient. Please do not confuse it with parsnip. I have been having hard time to buy parsley roots recently, so when I find it finally, I usually freeze some of them for the future use. I also bring some dried parsley root from Poland. If you do not have it, you can use green stems of flat Italian parsley instead.

Dried mushroom soup should be served with noodles. I like best not a typical plain pasta, but the ribbon-style egg noodles that are softer and richer in taste, and remind me those home-made.


Dried Porcini Soup
(Serves four)

1 cup dried wild mushrooms,
2 carrots,
1/4 medium-sized celery root,
1/2 medium-sized leek,
1 parsley root,
1 vegetable bouillon cube,
1 tbsp flour,
4 tbsp sour cream,
2 bay leaves, 4 whole peppercorns, and 3 all spice grains,
salt and pepper
2 tbsp chopped fresh parsley,
3 cups wide egg noodles.


Preparation:
1. Soak mushrooms in a cup of water for at least 4 hours, or preferably overnight,
2. In a large pot bring to boiling four cups of water with salt, bay leaves, pepper, and all spice.
3. Add all the vegetables washed and peeled off and cook them whole for about 40 minutes, until they become soft.
4. When vegetables are soft remove all of them and all the spices from the stock and add mushrooms with the water they were soaked in. Add the vegetable cube and cook for 30-40 minutes, until mushrooms become soft.
5. Mix flour with sour cream until smooth. Add a couple of tablespoons of hot mushroom stock, mix and add the whole mixture back to the pot. Let it boil gently for 3 minutes.
6. Taste and add ground pepper.
7. Cut carrots in small rings and add back to the soup.
8. Cook noodles according to instruction, drain, and divide among plates.
9. Pour the soup over the noodles. Sprinkle with fresh chopped parsley and serve.

Wednesday, March 16, 2011

Purple Radish Salad--To Try or to Behold


Last week for the first time ever I saw a purple radish. It looked a little bit like an UFO, or a mole that forgot to hide in his hole and stayed in the sun. I bought it for its looks, as a culinary curiosity, having no idea what to expect in terms of taste and how to cook it. And I am glad I did, as with a change of seasons I do not feel very creative in the kitchen.

Or rather, I am very creative but disorganized, so I cook as always, but just do not feel like measuring and recording everything. So of course I cannot make a post out of it, saying "a little bit of this" and "a little bit of that", even though the results are pretty nice.

But this radish came to my rescue and I would like to talk about it just because of its magnificent purple color, so typical of many fruits and vegetable with a blue pigment that are rich in antioxidants. It has a surprisingly mild, almost sweet taste with a kind of peppery aftertaste. Now that I tried it, I would suggest serving it raw, mostly in salads, as a source of iron and vitamins.

I made an Asian style salad, just to capture the aesthetic qualities of this beautiful tuber. I used also enoki mushrooms for contrast, which most of all, are recommended to be eaten raw. The whole salad was very delicate so I spiced it up with a dressing made of soy sauce, rice vinegar, and rice bran oil, and I topped it with a spoon of wasabi.

I am not sure I would be able to talk anyone one into that salad, but since purple radish is healthy and very inexpensive, it is worth to toss some of it into our regular salads, maybe add to a yogurt sauce or on top of cottage cheese, for color and crunchiness. Or maybe as I made it but differently arranged and mixed. And if you not feel like trying it just look how pretty it is. After adding some vinegar it changed color from a dark purple into more pink.


Purple Radish Salad

Ingredients:
One small purple radish, sliced or shredded,
a bunch of enoki mushrooms,
slices of English cucumber,
1/2 small onion, finely sliced,
1 tbsp rice vinegar,
1 tbsp soy sauce,
2 tbsp rice bran oil,
salt and freshly ground pepper,
a pinch of sugar,
chopped chives and a dollop of wasabi mayonnaise (optional).

Preparation:
1. Mix all the vegetables or layer them as I did.
2. Make a dressing and pour over the salad.
3. Decorate with chives, black sesame seeds, and wasabi mayonnaise.

Monday, March 14, 2011

Red Lentil Patties--A Vegetarian Burger Option


Last week, when I was cleaning my overstuffed kitchen cabinets, I found several bags of different lentils. I like to have them handy whenever I feel like cooking my family's favorite Afghan lentil dish, but even though I think my stock was too big. I decided to use some of them and to try finally a vegetarian recipe I had in mind for a long time.

This is another recipe from Metropolitan Home, which I thought could become a success also in my home and I thought I could use it on my younger son, who refuses to eat meat burgers and most other meats, to give him all the necessary proteins.

Many similar dishes come from the Indian cuisine, which is largely vegetarian, and often incorporates lentils, for their remarkable nutritious values. In Poland we use a similar technique to make potato patties, as a meat alternative. Last Saturday, while exchanging recipes with my Afghan friend, I learned that also in their cuisine there is a fairly similar dish, a sort of kebab, which can be made from both lentils and potatoes,and to which beef can be added as an option. We have already scheduled our cooking session for one of the forthcoming weekends, when I will try to learn some of the Afghan cuisine secrets.

But before that, today we are cooking lentil patties. I made some changes in the original recipe, most of all cutting on the amount of carrot, which I was afraid would make them taste too sweet. The dish was suggested to be served with curried mayonnaise or chutney. I found both sauces too rich and too bland. I tried my burgers with wasabi mayonnaise, that gave a nice hot contrast to their delicate taste, but most of all I enjoyed them with a thick Greek yogurt sauce, which is naturally sour, and I spiced it with garlic and chopped fresh coriander. And of course a bowl of a fresh cucumber or green salad on the side to lighten up a little bit the burgers, which because of lentil and cashews I found extremely fulfilling.


Lentil Burgers
(Makes 10 burgers)

Ingredients:
1 cup red lentil,
1 cup roasted cashew nuts,
1 cup diced carrot,
1 large onion chopped (about a cup),
1 large egg,
1 cup breadcrumbs,
3 garlic cloves, minced,
3 tsp mild curry powder,
2 tbsp olive oil, plus some extra for frying burgers,
1/2 tsp salt,
pepper to taste.


Preparation:
1. Put lentils and carrots in a medium pot, cover with water(about 1 and 1/2 cup), add salt, and bring to boil. Reduce the heat and cook until all the water evaporates and lentils become soft. This should take about 12-15 minutes. If there is some water left just drain the excess.
2. Heat the oil in a skillet, add onion, and fry until soft. Add curry and garlic and stir fry for about 30 seconds. Remove from the heat and let it cool.
3. Chop cashews in a food processor, add lentils with carrots, onions, and an egg. Pulse until the mixture is smooth but still has some texture. Transfer to a bowl and add breadcrumbs, salt, and pepper, and blend well all the ingredients.
4. Divide the mixture into 10 equal portions, and with hands dusted with flower form patties.


5. Cook burgers in a skillet on hot vegetable oil for about 2-3 minutes per side. Serve hot.


For yogurt sauce:
1 cup of Greek yogurt,
1/3 cup chopped fresh coriander leaves,
1 minced garlic clove,
salt and pepper.
Mix all the ingredients and serve over the burgers.

Saturday, March 12, 2011

Mascarpone Tart with Bloody Oranges--The End-of-Winter Dessert


I usually try to alternate recipes for desserts, main dishes, and appetisers, savory and sweet dishes, but recently I feel like doing desserts all the time. Maybe it is winter and low energy that make me crave for sweets more often, or maybe just seeing all kinds of fruits, especially all the beautiful citrus specimens, make me think about what to do with them.

So I make and bake desserts all the time. And I eat them! Before one disappears, already a next one is taken out of the oven. I have probably twenty different desserts so far photographed and still keep making them. Recently, I have been experimenting with tarts. I like tarts because they can be prepared ahead. I always keep in my refrigerator, and sometimes freeze, tart pastry ready to be baked at any moment. And chilling it for a long time makes it only more short.

It is my Polish habit from the old times to be able to make something sweet when someone calls that he or she will pop in in half an hour for a cup of tea. Well, here of course it is more formal and visits are rather scheduled, so we have plenty of time to be prepared. Nevertheless, I like to have always my tart base in the refrigerator, when I buy seasonal fruits to bake with that.

Yesterday, I bought beautiful bloody oranges. They were so intensively red inside that I decided to preserve their beauty and use them raw for my cake. This time I just baked a very short tart, which is my oldest, most classical, and most frequently used recipe. I made a cream to spread on top and decorated it with segments of fresh oranges.

I decided on this particular tart to obtain the contrast between its bottom, which is rich and very crunchy and the creamy top, which is very soft and fluffy. While making this recipe use preferably a tart pan with a removable bottom, as the cake is extremely delicate and crunchy and it might be difficult to take it out of any other type of cooking form.


Bloody Oranges Tart
(For a 10" tart pan)

The crust

Ingredients:
2 cups all purpose flour,
1 and 1/2 stick of butter, room temperature, cut into smaller cubes,
2 egg yolks,
1/4 cup sugar,
1 tsp sour cream.

Preparation:
1. Put the flour in a large bowl and working with hands rub in butter until it acquires a crumb-like texture.
2. In a small bowl stir in together egg yolks, sugar, and sour cream until it makes a very smooth mixture.
3. Add the mixture to the flour and butter crumbs and working with hands form a ball--try to knead it as little as possible because this would make the dough harder when baked. You may need to dust your hands with flour to clean them of the dough.
4. Wrap the dough in a plastic foil and chill in a refrigerator for a minimum of 2 hours. This dough can stay in a refrigerator even for 2-3 weeks.
5. Preheat the oven to 370 F.
6. Take a dough out of the refrigerator, and roll it out on a surface dusted lightly with flour into a circle of about 12 inches in diameter.
7. Butter the tart form with a tsp of butter and transfer the dough gently into it using a dough roller. Make all the the edges around the cake even, for a better presentation. Bake for 30 minutes, until the crust becomes gold.
8. Take it out of the oven and let it cool down completely.

Oranges

Supreme 3-4 bloody oranges (cut all the skin off and remove membranes to use just the clean segments).


The Mascarpone cream

Ingredients:
1 box (about 8 oz) Mascarpone cheese,
1/2 cup heavy whipping cream,
1/2 cup running honey--this is for the European taste, if you like dessert on the sweeter side you may add more honey.
2 tbsp pistachios for decoration.

Preparation:
1. Using electric mixer beat together the cream and the Mascarpone cheese--both ingredients should be the same temperature. It should make almost like whipped cream cheese.
2. Add the honey to the cream mixture and fold it in with a rubber spatula until it blends in the cream.
3. Spread the cream on the tart, decorate with oranges and pistachios.
4. Cool in a refrigerator for about 2 hours, cut, and serve.

Thursday, March 10, 2011

Beans and Walnut Spread--Totally Vegan


Since my previous post was about bread, today I would like to suggest something to put on it, which is always easy if you are not a vegan, but can be a challenge if you are.

I have many vegetarian friends, but only one who is a vegan. She does this for health reasons and believes that following such a strict diet keeps her healthy and makes her feel young. She does not eat any meat or dairy products and replaced milk with soy milk. When she was visiting us, I had no problem whatsoever to cook vegan dinners. I just prepared some of my many vegetarian recipes, omitting dairy products, and served with that a large bowl of salad that usually makes any vegetarian happy.

But for lunch she liked to have a piece bread. I love breads too, but I like to eat them with cheese or meats and salads and I was not prepared to make a vegan sandwich. She did not want to be a burden and simply ate her bread with sliced tomatoes. She did not even want to use any vegetable oil spreads instead of butter, fearing that it was something too chemical. But, as a good host, I did not feel comfortable not being able to offer her anything for lunch beyond bread and tomatoes.

This past summer, while going through my old recipes that I clipped from some magazines years ago, I found this recipe for a bread spread, coming from the Georgian cuisine. That discovery led to many more Georgian recipes that I found very interesting and will share in the future.

This spread, based on beans and walnuts, is a simple and rich in protein alternative to meats and cheese. The two ingredients combined can deliver absolutely all nutrients that can be found in meat and dairy.

The other day, after baking bread, I made this spread with my vegan friend in mind. It tasted pretty good especially on a fresh, still warm piece of bread. For those who are not vegan but are just open to trying something new, it could be an interesting addition to your menu, if you just tired of the usual thing you eat with your sandwich.I added also a couple tbsp of extra virgin oil,to replace a need for butter on the bread and after tasting I was quite happy with the result. I hope my vegan friend will be too next time she visits.


Beans and Walnut Spread

Ingredients:
1 can 12 oz, red bean,
1/2 cup chopped walnuts,
4 garlic cloves,
2 tbsp extra virgin olive oil,
1/3 cup fresh coriander leaves chopped,
1 tbsp lemon juice,
freshly ground pepper and sea salt for taste,
1/3 tsp fenugreek seeds (optional--only if you like it).

Preparation:
1. Put all the ingredients in a food processor and run it using the purée option button.


I think it is an excellent spicy and aromatic alternative to peanut butter, not only for vegans.

Tuesday, March 8, 2011

Bread Baked in a Pot--Listen to It Crack


Every year my neighbors organize a soup party. They serve an interesting menu of soups (guests are invited to bring they own specialties) and a self-made bread. It is very fresh, often still warm and it is so good that it disappears fast. It tastes great as a starter with a glass of wine and I usually eat so much of it that by the time soups are served I am already so full that I am hardly able to taste anything else.

I had to ask for the recipe and try to make this fabulous bread. Unfortunately, it did not come out too good first time I made it. This bread comes from a French tradition and is baked in a pot. Perhaps it did not come out exactly as my neighbors' masterpiece because I did not have the right vessel.

Last Christmas Eve, my neighbor came over and offered to teach me how to make it. He made it. I watched. It took his three visits, before the bread was ready to be baked. When I took it out of the oven and finally tasted, it was perfect. Again, my whole family, including my sister who was visiting us from Poland at that time, did not even let it cool down. It was gone to the last crumb, still hot. Now that I finally learned its secret, I make it from time to time over the weekend and we have it warm and aromatic with our Sunday brunch.

Talking about secrets, there are two that you need to learn about its preparation. First, the dough has to rise for a long time, so the best way is to make it a day before in the evening and let it stand overnight. Second, it must be baked in a pot with a cover that can tolerate very high temperature--450F. I was able to find such pot at Home Goods for just eight dollars and it works perfectly. Beside that, you do not even need any mixer or bread machine to make it. And when the house smells like a bakery, and the bread is already cooling down, just listen to it crack.


Bread Baked in a Pot

Ingredients:
3 and 1/2 cup bread flour, preferably King Arthur flour,
1/4 tsp dry yeasts,
1 and 3/4 cup water,
1 tsp salt.

Preparation:
1. Put water, flour, and yeast in a large and a relatively deep bowl (because the dough will grow overnight) and using a wooden spoon combine all the ingredients thoroughly. Leave it overnight covered with a dishtowel.
2. Dust a wooden surface with flour and dump the dough on it. Cover the dough with a dishtowel and let it stand for 15 minutes.
3. Spread a dishtowel over a round bread basket, dust it with a tablespoon of cornflour, put the dough on it, fold the ends of the dishtowel on top of it and leave it for 30 minutes.


4. Preheat oven (preferable a convection oven) to 500F and put an empty baking pot in it for about 15 minutes.
5. Lower the temperature to 425F, take out the pot and gently dump the dough in it. You can draw a cross on top of it or make a couple of diagonal cuts. Cover the pot with the lid and put it back in the oven.
6. After 30 minutes take the lid off and bake the bread in an open pot for another 15 minutes.
7. Take the pot out of the oven. Let the bread cool down and listen to it crack.


Cut a slice, spread butter on it, and enjoy.

Sunday, March 6, 2011

Spicy Papaya Pie--A Carotene Bomb


These days papayas are everywhere in Washington DC. They come mostly from China. They are yellow outside and intensely orange inside because they are very rich in carotene (vitamin A). For this reason papayas were introduced in Africa and in South East Asia, to prevent blindness among children. Since it is such a healthy and nutritious fruit, I have already written about it on my blog and I keep trying to incorporate papaya in my family's diet. But, besides that one recipe and fruit salads where I often include papaya, I am still in search of a perfect papaya recipe.

As I mentioned in my other post, I ate a savory papaya dish at one of my friends' house. I enjoyed it very much, especially that I do not eat scallops which it was served with. I was not able to contact my friend, who lives right now somewhere in Africa, to get exactly the details of that recipe, but this dish was so unique and tasty that really tried to reproduce it and started to experiment myself.

Through a trial and error process, I created something that reminded me of that savory dish he served. This dish stays slightly on the sweet side like anything made of carrot, pumpkin, or sweet potatoes, but I think it came out quite interesting. I made one vegetarian version of it and one with prosciutto. On the picture you see bacon, although at the last moment I decided to go for something more delicate and I used prosciutto instead. I think it was a good decision as bacon could have overshadowed the taste of the papaya. I prefer papaya with prosciutto, if is served as a stand-alone dish with baguette or as a seafood accompaniment (like my friend did it), but a purely vegetarian version is also worth trying.


Spicy Papaya Pie

Ingredients:
1 small very ripe papaya,
1 egg,
1/2 cup shredded Parmesan,
1 small onion, chopped,
4 cloves garlic,
1 tbsp all purpose flour,
2 tbsp sour cream (heavy whipping would also make),
1/2 cup chopped parsley,
1/2 cup prosciutto ( optional) cut into strips,
3 tbsp oil,
1 tsp salt,
1/4 tsp pepper,
1 tsp red smoked pepper,
a pinch of Cayenne pepper (or more depending on how spicy you like it),
2 tbsp breadcrumbs.


Preparation:
1. Peel off papaya and and cut into small cubes, squeezing gently some of the extra juice. Put in a large bowl.
2. Heat 2 tbsp oil and fry onion for about 3 minutes. Add prosciutto and fry for additional 1-2 minutes.
3. Add onion with prosciutto to papaya and follow with garlic, egg, flower, cream, parsley, Parmesan, and all the spices.
4. Using a blender grind the whole mixture until it resembles cottage cheese. If you do not have a blender you can just grate papaya on a big hole grinder and add all the other ingredients.
5. Spread another tbsp of oil all over the baking dish and sprinkle it with half of breadcrumbs. Cut garlic into slices and arrange over the bottom of the dish (it will be absorbed into the papaya during baking).
6. Put the papaya mixture into the dish, and cover with remaining breadcrumbs on top.
7. Bake for 45-50 minutes, until breadcrumbs are gold and the papaya almost brown.

Serve warm.

Friday, March 4, 2011

Brazil Nuts Cake--Right for the Carnival


Yesterday I learned that today was the first day of the 2011 carnival in Rio. Wouldn't it be nice to celebrate that with a piece of a rich Brazil nuts cake? This idea came to me when I was wondering what to do with the pound of Brazil nuts that I had bought recently.

Brazil nuts are an important source of protein, vitamins, and omega three fatty acids. Brazil nuts are also the richest source of selenium, which has anticancer properties. This is why you can buy the Brazil nut oil in many healthy food stores and it is also used to make vitamin supplements.

One easy way to get all these nutrients in your daily food is to use the Brazil nut oil in salads instead of olive oil. You can also use Brazil nuts instead of pine nuts to make pesto sauce, although I am not sure if pesto with Brazil nuts tastes better than the original version. Besides, on this particular occasion, I was looking for something more festive.

During my vacations in Poland last summer I got a recipe for a cake with Brazil nuts and bananas. It is not only very tasty, but also very rich and nutritious, like a muffin or a banana bread with nuts, bananas, and oats.

This is not a cake that I would serve as an after dinner dessert. It feels almost like a good cereal, or Swiss muesli breakfast. The nuts make it crunchy, while raisins and bananas make it sweet and soft, and oats make it very filling. So today, to celebrate the opening of the carnival in Rio, I have started my day with a cup of coffee and a slice of the Brazil nuts cake.


Brazil Nuts Cake
(For a 10" loaf pan)

Ingredients:
2 cups all purpose flour,
1 cup oats,
1 cup sugar,
2 stick butter, room temperature,
1 cup raisins,
1 cup Brazil nuts chopped,
3 bananas, cut into small pieces,
3 eggs,
1 tsp cinnamon,
1 tbsp cocoa,
1 tsp baking powder,
1 tsp baking soda.

Preparation:
1. Preheat oven to 375F.
2. In a stand-up mixer mix together butter and sugar until smooth and fluffy.
3. Add eggs, one by one, running the mixer in between.
4. Add the bananas and mix well.
5. Put flour, oats, cocoa, baking powder, baking soda, and cinnamon in a separate bowl. Mix them and then incorporate everything into the batter.
6. Butter the loaf pan and sprinkle it with breadcrumbs.
7. Add raisins and nuts to the batter, mix well and put the whole batter into the loaf pan.
8. Bake for 50-60 minutes.

Cool and serve with a chocolate sauce or powdered sugar on top.